


|
Obtendo o seu Trinity Audio jogador pronto ...
|
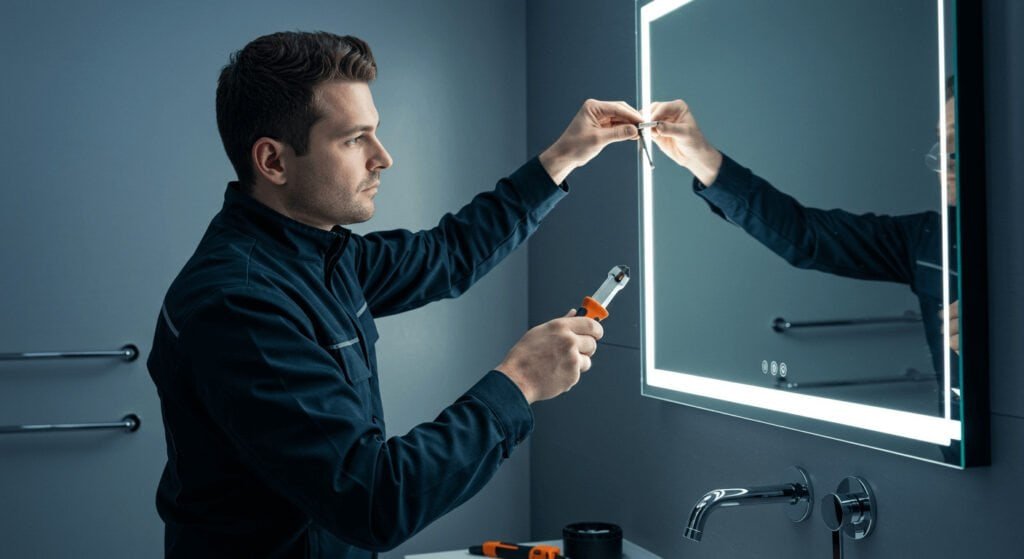
How to remove mirror from bathroom wall? Removing a bathroom mirror can seem intimidating when you consider potential damage to walls or breaking expensive glass. This challenge becomes even more complex when dealing with modern lighted mirrors or led bathroom mirrors that require electrical disconnection.
The safest method to remove a bathroom mirror involves identifying the mounting system, gathering appropriate tools, protecting surrounding surfaces, and following systematic removal techniques. This approach minimizes wall damage and prevents glass breakage while ensuring successful mirror removal.
Understanding the proper techniques will save you time, dinheiro, e lesão potencial durante o seu projeto de reforma do banheiro.
What Tools Do You Need to Remove a Bathroom Mirror Safely?
The tools you need are pretty self-explanatory based on your specific situation. What’s not specific are safety tools. Even with a framed or unframed mirror, you need to make sure you’re safe.
O basic tool kit includes safety glasses, luvas de trabalho, plastic sheeting, utility knife, faca de vidraceiro, hair dryer, fishing line or piano wire, drill with bits, screwdriver set, and adhesive remover. Additional tools may be required for led mirror or backlit mirror installations with electrical components.
It’s a little more than that. The good news: we can reuse the brackets in our professional-quality way of removing and reinstalling a mounted, frameless bathroom wall mirror. Também, consider the cost to remove a mirror like this. Tipicamente, professionals will charge anywhere from $50 para $200 to remove a bathroom mirror for you. How about giving yourself a little bonus and removing it yourself? Just be a little extra safe, especially if you have a large rectangular bathroom mirror, or a heavy lighted vanity mirror for a bathroom installation. For those, you might want to have a helper. And, we’re not even going to talk about the problems with installing something like that in connection with electrical. That’s a little more than your .
How to Prepare the Bathroom Area Before Mirror Removal?
The biggest thing is getting prepared. That’s what’s going to set you up for success when you’re removing your bathroom wall mirror.
Clear the bathroom vanity and surrounding area completely. Cover the floor with protective plastic sheeting and tape cardboard over the sink to prevent glass fragments from causing damage. Remove any items from nearby shelves or medicine cabinets.
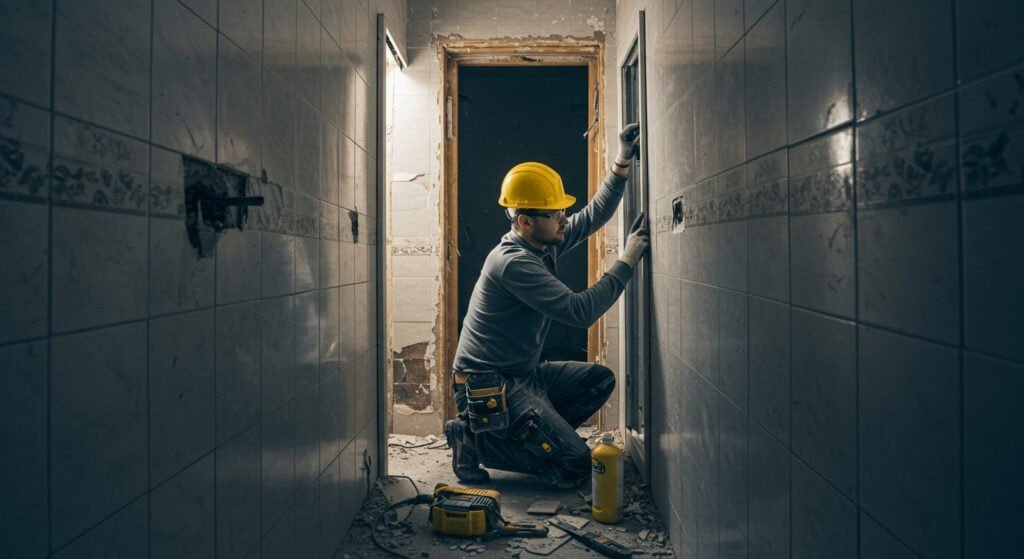
Look at your mirror and look at how it’s mounted to the wall. When we’re talking about a frameless, modern-style bathroom wall mirror, 99 fora de 100 times, it’s going to be completely glued up to the wall. When you talk about bathroom mirrors with a black frame around it or a frame of some sort, it’s typically going to have some clips that are holding it up.
When it comes to a lighted bathroom mirror or an LED vanity mirror, before you do anything, you need to go to your circuit breaker box. Find the circuit that supplies power to your existing mirror, and flip it off. Then take pictures of how everything is wired up before you disconnect anything. Especially when you’re dealing with one of these modern lighted mirrors for bathrooms, that’s going to end up being pivotal later on.
How Are Frameless Mirrors Attached to Walls?
Because when you’re looking at bathroom wall mirrors, especially your frameless mirrors, they can be mounted in different ways. When you understand how they’re mounted, you can take steps to prevent unnecessary damage to the wall.
Most frameless glass mirror installations employ construction adhesive applied directly to the wall surface. Mirror mastic creates a strong bond between the mirror backing and drywall, making removal challenging without proper technique.
Sometimes you can mix in some mechanical fastening as well. With a small bathroom mirror, it might have eight mirror clips around it. But if you’re doing a huge, over-the-countertop mirror or something like this, it could very well be just glued to the wall.
When it comes to something like a lighted mirror or an LED-type vanity mirror installation; typically on more custom, professional installations, there are brackets that they put behind it that mounts to the wall. It’s going to be professional brackets that can handle the weight of the mirror on the wall. Moreover, if it’s a professional bathroom light mirror installation, there might be some functionality to the mounting hardware they used. It could have been designed for simple removal and replacement.
Como os espelhos de vaidade estão presos à parede?
Based on the size and weight of the mirror, here are some of the places you might find it and the way it’s attached that significantly affects how you’re going to go about removing a modern bathroom vanity mirror: tamanho, weight, and installation location.
Standard bathroom vanity mirrors typically mount using a combination of mirror clips and adhesive backing. The clips provide immediate support during installation while the adhesive creates long-term stability.
When it comes to a lighted vanity mirror or an LED light mirror vanity, this is a bathroom vanity mirror. Odds are you’re putting this over a bathroom vanity. You have to think about electrical and that kind of stuff that might come into play. Maybe there are mounting brackets that they put in there so it connects to an electrical box behind the wall.
A light up vanity mirror installation sometimes has a transformer that’s mounted separately from the mirror. A wall mirror with lights often has clips. These clips are specialized clips specifically designed for the wire that’s coming down in this installation for this type of mirror. It’s all about identifying how the mirror is mounted and preparing yourself properly for the project.
How Do You Remove a Bathroom Mirror Without Destroying Drywall?
If you don’t care and go ripping and tearing and pulling stuff off the wall, you can tear up the drywall. It’s going to cost you a whole lot more to fix the drywall than what it would cost you to pay the professionals to come and take the mirror down for you.
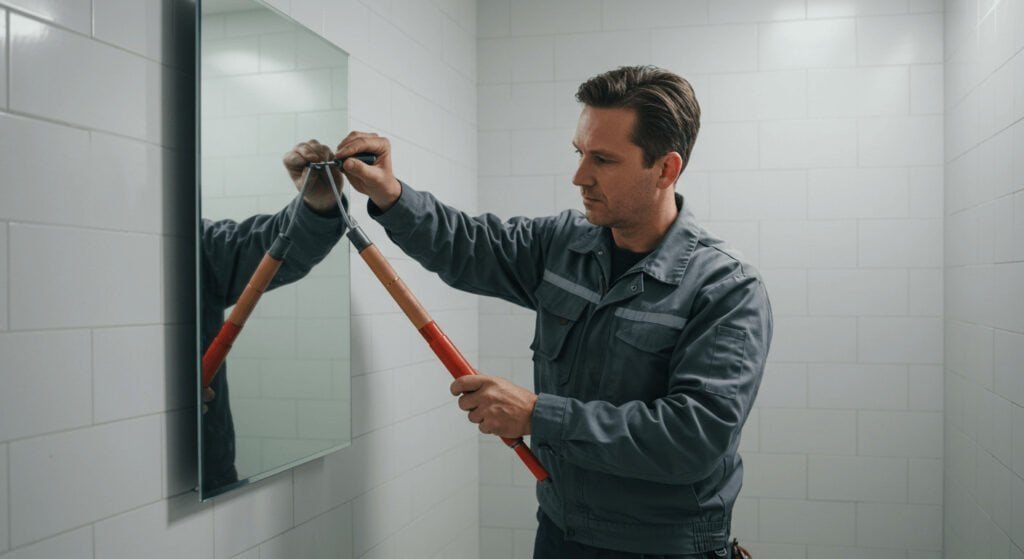
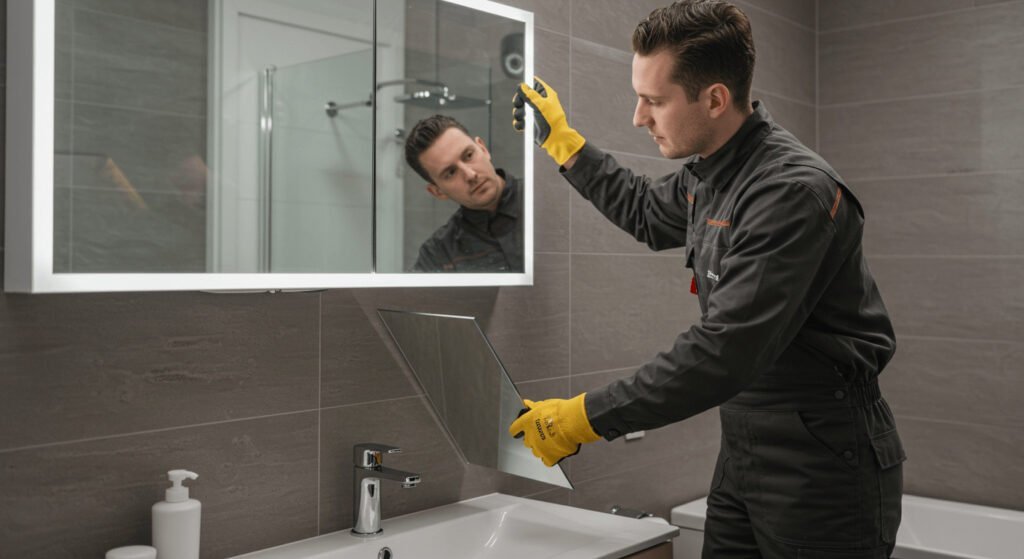
Use a hair dryer to warm adhesive areas, making the bond more pliable and easier to separate. Apply heat in sections rather than attempting to warm the entire mirror simultaneously.
Go back and forth behind the mirror sawing that adhesive slowly pulling the mirror away from the wall. This takes time, and you want to keep pressure on the mirror the entire time. The one thing you don’t want to do is to jerk quickly, and it pulls away from the wall quickly, and the whole thing just starts to come down. For the areas behind the mirror where the adhesive’s just not cutting through, you can also try applying a bit more heat and then [attempt cutting] it again.
Another thing you can do is insert putty knives around underneath the mirror and start to work those in there. This is a great method if you have a bathroom mirror installation where there wasn’t a lot of adhesive used. You slowly work the putty knives under there, and you slide them in there. What you don’t want to do is pry the thing off the wall. Never try to pry the mirror off the wall. It’s not going to work. You’re soon going to be crying because of the drywall you have to have repaired.
| Tipo de espelho | Nível de risco | Recommended Method | Special Considerations |
|---|---|---|---|
| Espelho de vidro padrão | Médio | Heat + Wire Cutting | Protect floor from glass |
| Espelho do banheiro LED | Alto | Electrical Disconnect First | Require electrical knowledge |
| Lighted Vanity Mirror | Alto | Professional Assessment | Complex wiring systems |
| Small Bathroom Mirror | Baixo | Clip Removal | Minimal adhesive typically |
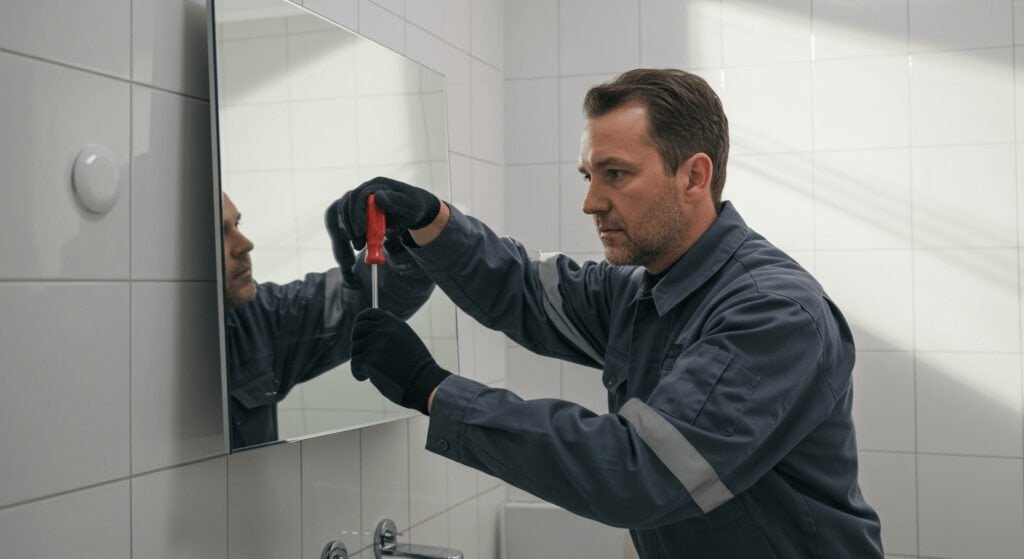
How to Remove Bathroom Mirror with Clips?
When it comes to wall-mounted bathroom mirrors, it’s important to remove those clips in a systematic way. You don’t want the mirror to come crashing down into your sink. Then you’re in a world of hurt. The way you do it is you take and remove one clip at a time, holding the mirror at the same time. Then you go to the next one. If you need to put something under the mirror to support it that’s fine, but you don’t want that mirror to come crashing down.
Begin by having an assistant support the mirror weight while you work on the clips. Remove screws from clips starting at the top and working downward to maintain control of the mirror position.
Simply go around and remove one clip at a time, being careful not to break the glass. Some of them will be spring-loaded clips. You might have to get in there and pry them out just a little bit to get them to release pressure on the mirror so you can then take them off. Make sure you save all those for your doubly-frustrating next project when you get to install the new mirror.
Once you get those off, that mirror should come right off. If it doesn’t, that’s an indication that you’ve still got a piece of adhesive back there. Take the fishing line or piano wire and slash back and forth through that adhesive until you get it off the wall. This also works with lighted vanity mirrors in the bathroom where you’ve got the clips plus a little bit of adhesive on each one of those clips helping to hold it in place.
How to Remove Mirror Glue from Drywall?
After you get it off the wall, realize that getting the glue off the back of it, getting the goo off the wall, that’s a different animal. We’ll go into that in another episode. You don’t want to damage the paper facing of the drywall. You don’t want to mess up the texture of the wall because you’re getting ready to put another mirror up there, and now it’s all screwed up.
Commercial adhesive removers work effectively for most mirror installation adhesives. Apply the remover according to manufacturer instructions and allow proper dwell time for chemical action to soften the adhesive.
You can scrape that off with a plastic putty knife. You want to use a plastic putty knife because it’s not going to gouge your wall. You don’t want to take and try to scrape large areas. You want to do small areas, just a little bit at a time, to make sure you’re not creating problems in the process. Now, this is apart from using heat and maybe a chemical to help get that off. You can use heat from a hair dryer to help soften that too.
If you’re trying to get some of the glue off and it’s not coming off, my advice would be to repeat the application process, but don’t try to increase the pressure on your scraper. All right? Às vezes, depending on what you’ve got behind there, you might have to do a little light sanding with a very high-grit sandpaper just to get everything nice and smooth. Head on over to the paint section and pick yourself out a little can of primer. You prime up that little area that you’ve been working on so you don’t peel the paper off the drywall, and you end up with a nice mess. Então, you can go ahead and install your bathroom vanity mirrors or your lovely new modern bathroom mirror systems.
How to Remove Mirror Tiles from Wall?
If you’re wanting to remove a wall of mirror tiles, then you’re going to have to just get after it. It’s a pain in the butt because every single one of those has adhesive on the back of it and it’s stuck to the wall. Just like we talked about with the vanity lights and the lighted vanity mirror as well as the hidden television we talked about before, you’re going to have to get each one of those down because bathroom mirror installations are done one tile at a time.
Start removal from an upper corner to establish working access and prevent tiles from falling unexpectedly. Use a hair dryer to warm individual tiles before attempting removal.
You’re going to have to get in there and slide something sharp behind each one of those to break the adhesive, carefully pull it off the wall, and move on to the next one. Whether you’re doing this one tile at a time, to a wall of mirror tiles, to a modern bathroom mirror, to a lighted vanity mirror, to your hidden television or your fabulous bathroom vanity mirrors, you got to do what you got to do, man. Start pulling that stuff down. When you get done, you might have a lot of clean-up to do. Make sure you keep some of those mirror tiles separated out and in good condition so that you can use them somewhere else on down the road.
How to Replace Bathroom Mirror?
Mirror replacement involves careful measurement, proper mounting preparation, and consideration of upgraded options like lighted mirrors. Planning ensures successful installation that meets both functional and aesthetic requirements.
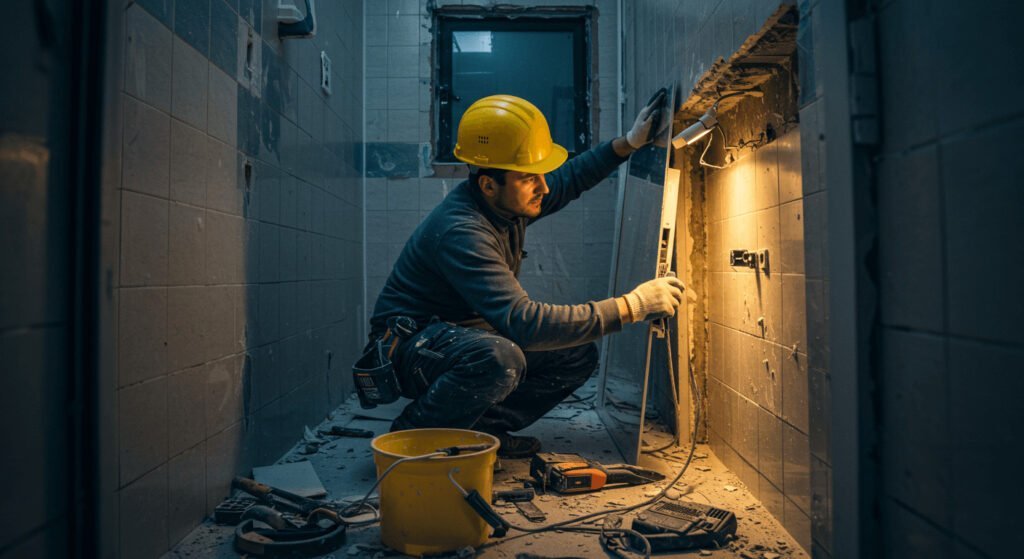
Measure the wall space accurately and consider any changes in plumbing or electrical requirements for upgraded mirror systems. Modern installations often incorporate led vanity mirror or backlit mirror options that require electrical preparation.
| Installation Type | Electrical Requirements | Mounting Complexity | Average Cost Range |
|---|---|---|---|
| Standard Mirror | None | Baixo | $50-$200 |
| Led Mirror | 120V Circuit | Médio | $200-$800 |
| Lighted Makeup Mirror | 120V + Switch | Médio | $150-$600 |
| Vanity Mirror with Led Lights | 120V + Controles | Alto | $300-$1200 |
Prepare the wall surface by cleaning adhesive residue and repairing any damage from the previous installation. Prime exposed drywall areas to ensure proper adhesive bonding. Consider upgrading to lighted vanity mirrors or led bathroom mirror systems that provide enhanced functionality and modern aesthetics. Professional installation may be advisable for complex electrical installations involving bathroom vanity lights or integrated lighting systems.
How to Fix a Bathroom Mirror?
Mirror repair addresses common issues without requiring complete replacement. Many problems can be resolved through simple adjustments or component replacement.
Loose mirrors often require additional adhesive application or clip adjustment. Remove the mirror carefully and clean both the wall surface and mirror backing before applying new adhesive or repositioning mounting hardware.
For lighted vanity mirrors for bathroom applications, electrical issues may involve bulb replacement, transformer problems, or switch malfunctions. Check electrical connections and replace components systematically to identify the source of lighting problems.
Some led light mirror vanity systems include replaceable LED strips that can extend mirror life significantly. Consult manufacturer documentation for specific repair procedures related to your mirror model. Simple cleaning and maintenance can prevent many issues that appear to require mirror replacement, particularly with wall mirror with lights installations that accumulate dust and moisture over time.
Successfully removing a bathroom mirror requires proper preparation, ferramentas apropriadas, and systematic technique. Whether replacing with a standard mirror or upgrading to modern lighted mirrors for bathrooms, following these procedures ensures safe removal without wall damage. Consider professional assistance for complex electrical installations or when uncertain about proper removal techniques.
- Para aprender a escolher o espelho do banheiro certo, clique aqui.
- Para aprender a instalar um espelho, escolha aqui.
- Para aprender a escolher o espelho do tamanho certo, clique aqui.
- Para saber como os espelhos são feitos, clique aqui.
- Clique aqui e você aprenderá por que ficamos melhores nos espelhos.
- Clique aqui você aprenderá sobre o topo 10 Fabricantes de espelho de LED para 2024.
- Clique aqui para descobrir por que minha luz de espelho de vaidade não acende?
- Descubra quão alto deve ser o espelho do banheiro? Clique aqui
- Clique aqui se você não sabe como limpar seu espelho
- Para descobrir como consertar o espelho do sensor de toque não funcionando, clique aqui
- Descobrir 10 Problemas comuns do espelho do banheiro LED