


|
Obtenir votre Trinity Audio joueur prêt ...
|
Un mauvais éclairage autour de votre miroir habituel crée des ombres frustrantes lors du maquillage ou du rasage.. D'innombrables propriétaires sont confrontés à ce défi quotidien dans les salles de bains et les chambres.. Créer votre propre miroir LED offre un style élégant, solution personnalisée à une fraction des coûts de vente au détail.
DIY un miroir LED à la maison, rassembler un miroir, Bandes LED, alimentation, adhésif, et outils de base. Montez les bandes LED autour du périmètre du miroir ou derrière celui-ci pour le rétroéclairage. Connectez-vous à une source d'alimentation et sécurisez tous les composants pour obtenir un miroir mural éclairé d'aspect professionnel..
Explorons les étapes détaillées pour transformer votre miroir ordinaire en une pièce maîtresse éclairée pour votre maison.
De quels matériaux avez-vous besoin pour un miroir LED DIY?
Commencer votre projet de miroir LED DIY nécessite de rassembler les bons matériaux avant de commencer. Une bonne préparation garantit une exécution plus fluide et de meilleurs résultats pour votre miroir de salle de bain avec lumières LED.
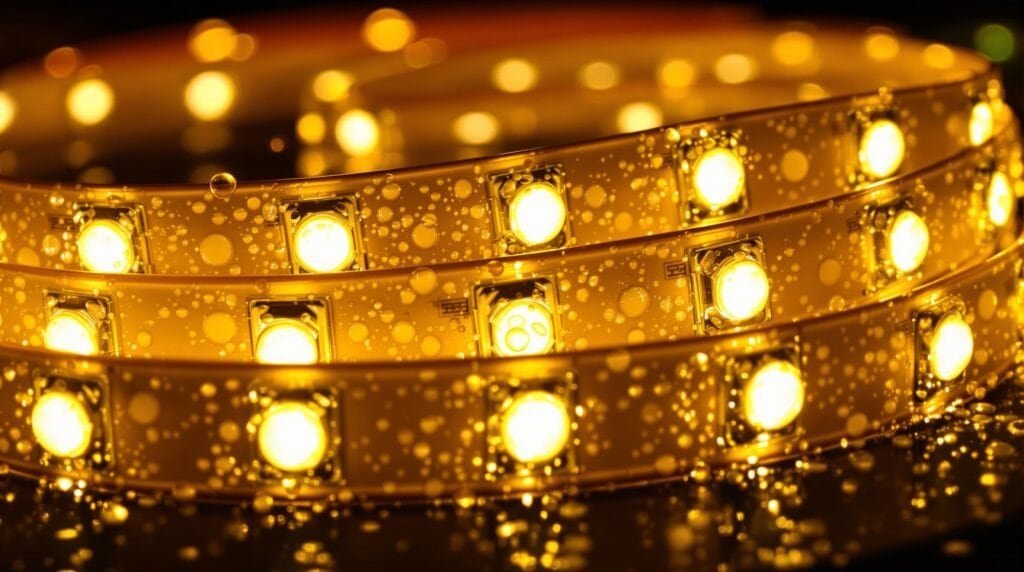
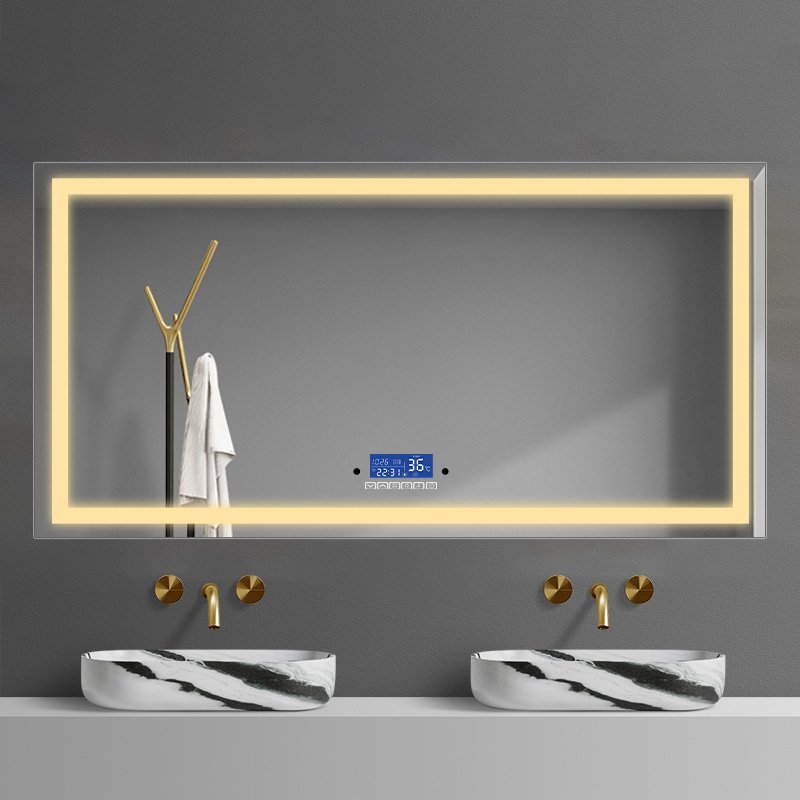
Les matériaux essentiels incluent un miroir de votre choix, Bandes lumineuses LED, une alimentation, connecteurs de fils, ruban adhésif double face, un ruban à mesurer, coupe-fils, et commandes de gradateur en option. Pour des projets plus avancés, inclure un élément de désembuage ou des composants Bluetooth.
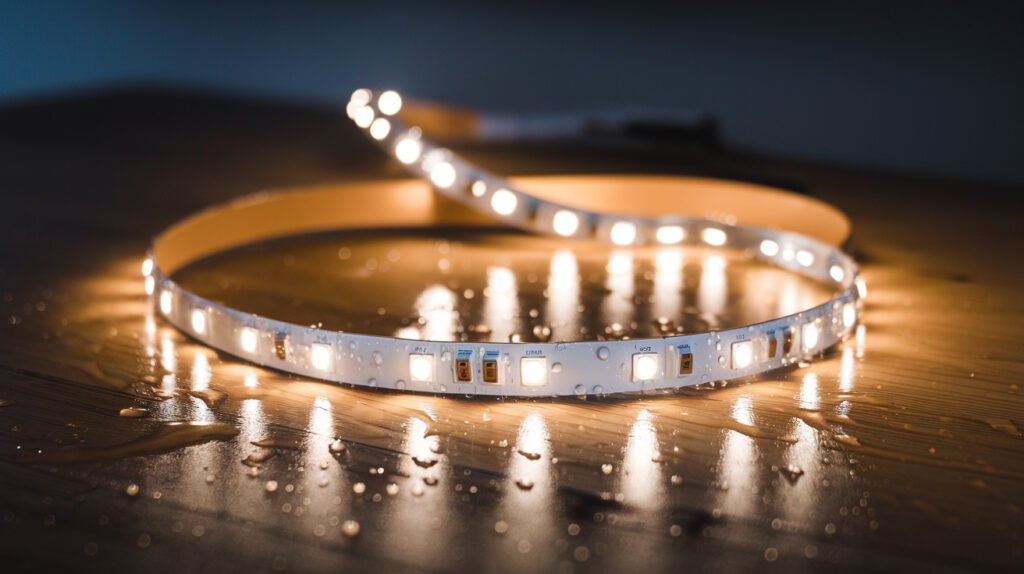
Lors de la sélection des matériaux, la qualité compte beaucoup. Choisissez des bandes LED avec une luminosité appropriée (mesuré en lumens) et options de température de couleur. Blanc froid (6000K+) offre une clarté clinique idéale pour l'application du maquillage, tout en blanc chaud (2700-3000K) crée une atmosphère chaleureuse parfaite pour les miroirs lumineux de la chambre.
Les bandes LED résistantes à l'eau sont essentielles pour les installations de salle de bain où l'humidité est présente. Pensez à l'IRC (Index de rendu des couleurs) notes ci-dessus 90 pour la représentation des couleurs la plus précise lorsque vous utilisez votre miroir LED pour l'application du maquillage. Les matériaux haut de gamme peuvent coûter plus cher au départ, mais évitent les remplacements fréquents et les risques potentiels pour la sécurité..
Comment rétro-éclairer un miroir?
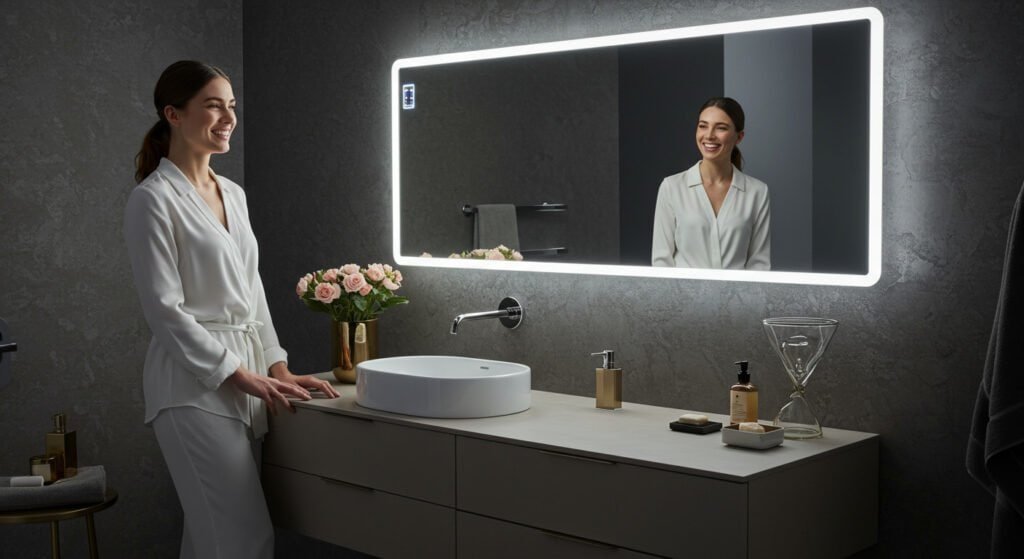
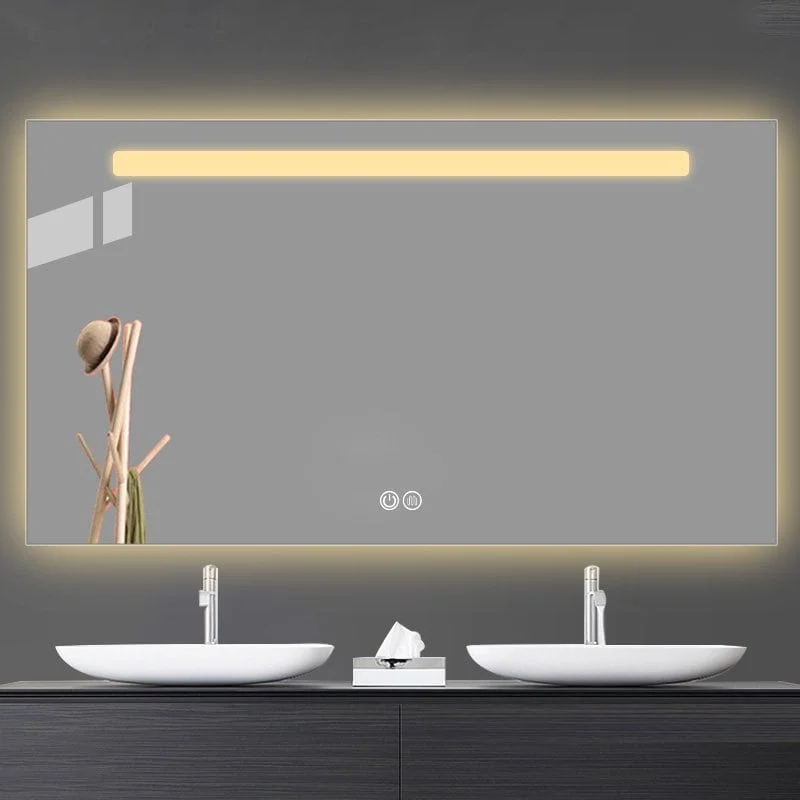
Le rétroéclairage crée un effet flottant qui ajoute de la profondeur et de l'ambiance à la conception de votre miroir.. Cette technique est devenue de plus en plus populaire dans la décoration intérieure moderne pour des raisons à la fois fonctionnelles et esthétiques..
Pour créer une lumière LED derrière un miroir style DIY, mesurez et montez des bandes LED sur le mur derrière votre miroir avec 2-3 pouces d'espace entre le mur et le miroir. Assurer une répartition uniforme de l'éclairage en plaçant des bandes sur tout le périmètre.
La clé d’un rétroéclairage réussi réside dans une diffusion et un montage appropriés. D'abord, nettoyer soigneusement la surface du mur et l'arrière du miroir. Deuxième, envisagez d'installer un cadre en bois pour créer l'espace parfait entre le miroir et le mur - environ 1-2 pouces offre une diffusion optimale de la lumière sans créer de points chauds.
Troisième, utilisez des canaux en aluminium avec des couvercles de diffuseur pour adoucir les points lumineux LED en une lueur douce. Quatrième, sélectionnez des bandes LED étanches pour les installations de salle de bain. Enfin, montez le miroir avec le matériel d'écartement approprié qui peut supporter son poids tout en maintenant la distance nécessaire par rapport au mur.
Cette approche crée un effet d'aspect professionnel similaire aux miroirs muraux éclairés haut de gamme, sans le prix élevé.. Certains propriétaires ajoutent également un film dépoli aux bords du miroir pour améliorer l’effet de diffusion et créer une apparence plus polie..
Comment concevoir et installer une bande lumineuse LED derrière un miroir?
La conception de votre installation LED nécessite une planification réfléchie pour obtenir le miroir parfait avec des lumières LED. Projet de bricolage. La phase de conception est cruciale car elle détermine à la fois la fonctionnalité et l'esthétique..
Planifiez votre disposition d'éclairage en fonction de la taille du miroir et de la luminosité souhaitée, choisir entre un éclairage périmétrique ou une couverture arrière complète. Sélectionnez la température de couleur et le niveau de luminosité appropriés à vos besoins spécifiques, que ce soit pour une application précise du maquillage ou un éclairage ambiant de la salle de bain.
Une planification détaillée rend l'installation beaucoup plus facile et plus réussie. Commencez par créer un modèle de votre miroir sur papier pour planifier le placement exact des bandes LED.. Pour les miroirs de salle de bain, calculer les lumens nécessaires en fonction de la taille de la pièce (en général 75-100 lumens par pied carré pour un éclairage adéquat).
Envisagez d'installer des canaux en aluminium avec des diffuseurs pour créer une diffusion de la lumière d'aspect professionnel plutôt que des points LED individuels visibles.. Lorsque vous travaillez avec plusieurs bandes, assurez-vous qu’ils sont connectés en parallèle plutôt qu’en série pour maintenir une luminosité constante tout au long. Pour les miroirs plus larges que 48 pouces, envisager d'utiliser un point d'injection d'énergie central pour éviter les chutes de tension qui pourraient provoquer un éclairage inégal sur les bords.
Si vous installez un miroir de courtoisie éclairé par vos soins dans une salle de bain, s'assurer que tous les composants électriques répondent aux normes de sécurité appropriées pour les environnements humides. Une bonne planification évite les problèmes courants tels que les points chauds visibles, éclairage inégal, ou une luminosité insuffisante pouvant nécessiter une réinstallation coûteuse.
Comment bricoler des bandes lumineuses LED pour miroir?
La création de bandes LED personnalisées spécifiquement pour votre miroir garantit un ajustement parfait et un éclairage optimal pour votre projet d'éclairage de miroir DIY.. La personnalisation de votre configuration LED vous permet de répondre à des besoins et contraintes spécifiques.
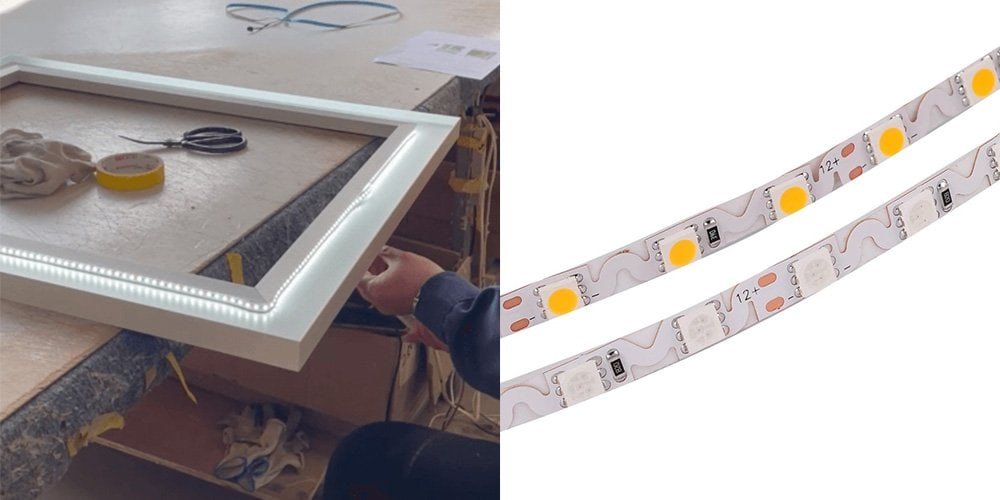
Pour les projets de miroirs lumineux LED DIY., mesurez précisément le périmètre de votre miroir, achetez une bande lumineuse LED de qualité qui peut être coupée à intervalles marqués, et utilisez des connecteurs pour joindre les sections selon vos besoins. Assurer tension cohérence dans tout le système pour un éclairage uniforme.
Les configurations LED personnalisées nécessitent une attention particulière aux détails techniques pour des performances optimales.
- Déterminez la luminosité idéale en tenant compte de l'emplacement et de la fonction de votre miroir : l'application du maquillage nécessite environ 300-500 lumens, tandis que l'éclairage ambiant n'a besoin que 150-200 lumens.
- Sélectionnez la densité de LED appropriée (LED par mètre)—une densité plus élevée (60+ LED/compteur) fournit un éclairage plus uniforme sans espaces visibles.
- Pensez à installer un variateur pour régler la luminosité en fonction des différents besoins et moments de la journée.
- Utilisez des canaux en aluminium avec des diffuseurs pour créer un aspect professionnel, répartition uniforme de la lumière plutôt que des points LED individuels visibles.
- Choisissez des indices de résistance aux intempéries adaptés à votre emplacement d'installation : IP65 ou supérieur pour les environnements de salle de bains.
Si vous créez des designs élaborés, dessinez d'abord votre motif et utilisez des bandes LED flexibles qui peuvent se plier autour des courbes sans endommager le circuit. Cette approche vous permet de créer des effets de lampe miroir DIY véritablement personnalisés qui correspondent à votre décor spécifique et à vos exigences fonctionnelles..

Quelle alimentation choisir pour votre miroir LED?
La sélection de l'alimentation électrique appropriée est cruciale pour la sécurité et les performances de votre projet de cadre de miroir LED DIY.. Une alimentation électrique inadéquate peut entraîner une gradation, surchauffe, voire des risques électriques.
Choisissez une alimentation avec une tension adaptée à vos bandes LED (généralement 12V ou 24V) et une capacité de puissance suffisante en calculant la consommation électrique totale (longueur des bandes × watts par mètre) plus 20% tampon. Assurez-vous qu’il comprend des certifications de sécurité pour un usage domestique.
Lors de la planification de votre système électrique, considérez ces facteurs critiques:
- D'abord, Déterminez si votre installation nécessite un adaptateur enfichable ou une connexion câblée. Les codes de salle de bains nécessitent souvent des installations câblées avec Protection GFCI.
- Deuxième, calculez les besoins électriques exacts en multipliant la puissance par mètre de vos bandes LED par le nombre total de mètres utilisés, puis ajoutez 20% capacité excédentaire pour éviter les surcharges.
- Troisième, envisagez une expansion future, si vous pouvez ajouter plus de LED plus tard, sélectionnez une alimentation avec une capacité supplémentaire.
- Quatrième, pour les installations sur 5 mètres, mettre en œuvre des points d’injection de puissance pour maintenir une luminosité constante tout au long. Cinquième, installer un variateur entre l'alimentation et les LED pour une luminosité réglable.
Enfin, assurez-vous que toutes les connexions sont sécurisées et isolées, en particulier dans les environnements de salle de bains où l'humidité est présente. Une bonne planification de l'alimentation évite la frustration des LED faibles, échecs fréquents, ou risques potentiels pour la sécurité : considérations essentielles pour toute installation de miroir mural éclairé pour meuble-lavabo.
Comment créer un cadre de miroir LED DIY?
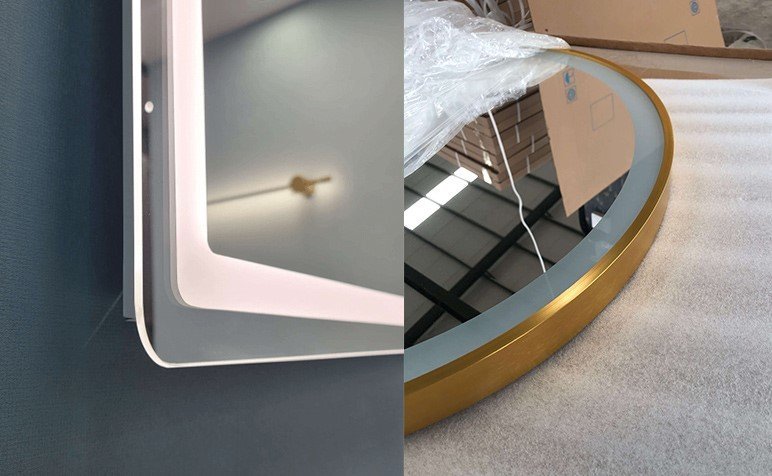
La fabrication d'un cadre personnalisé élève votre projet de cadre de miroir LED DIY de basique à sophistiqué.. Le cadre améliore non seulement l'esthétique mais cache également le matériel LED pour une apparence plus propre..
Pour créer un cadre de miroir DIY avec éclairage intégré, sélectionnez des matériaux de cadre compatibles avec votre décor, construire ou modifier le cadre pour inclure un canal pour le placement de la bande LED, et assurent une diffusion adéquate pour un éclairage uniforme sans points LED visibles.
Concevoir un cadre LED efficace nécessite d'équilibrer la forme et la fonction. Commencez par sélectionner les matériaux de cadre appropriés : le bois offre une polyvalence et une personnalisation facile., tandis que l'aluminium offre une meilleure dissipation thermique pour les LED. Lors de la conception, créez un canal encastré d'environ ½ pouce de profondeur et suffisamment large pour vos bandes LED ainsi que des canaux en aluminium si vous les utilisez.
Pour les connexions d'angle, utilisez des coupes d'onglet à 45 degrés et des supports d'angle renforcés pour garantir la stabilité et un alignement parfait. Pensez à ajouter une bande de diffuseur en acrylique givré sur les LED pour éliminer les points visibles et créer une ambiance lisse., éclairage continu. Pour les installations de salle de bains, traiter les cadres en bois avec des produits d'étanchéité résistants à l'humidité pour éviter la déformation.
Si vous concevez un miroir de maquillage, envisagez d'incorporer différents modes d'éclairage en installant des bandes LED blanc froid et chaud séparées contrôlées par des interrupteurs séparés. Cela permet de basculer entre la simulation de la lumière du jour pour une application précise du maquillage et une lumière plus chaude pour les routines du soir.. Le cadre doit dissimuler tout le câblage tout en permettant l'accès pour une maintenance future. Pensez à créer une section amovible ou un panneau d'accès au bas du cadre..
Comment fabriquer un miroir pleine longueur avec des lumières?
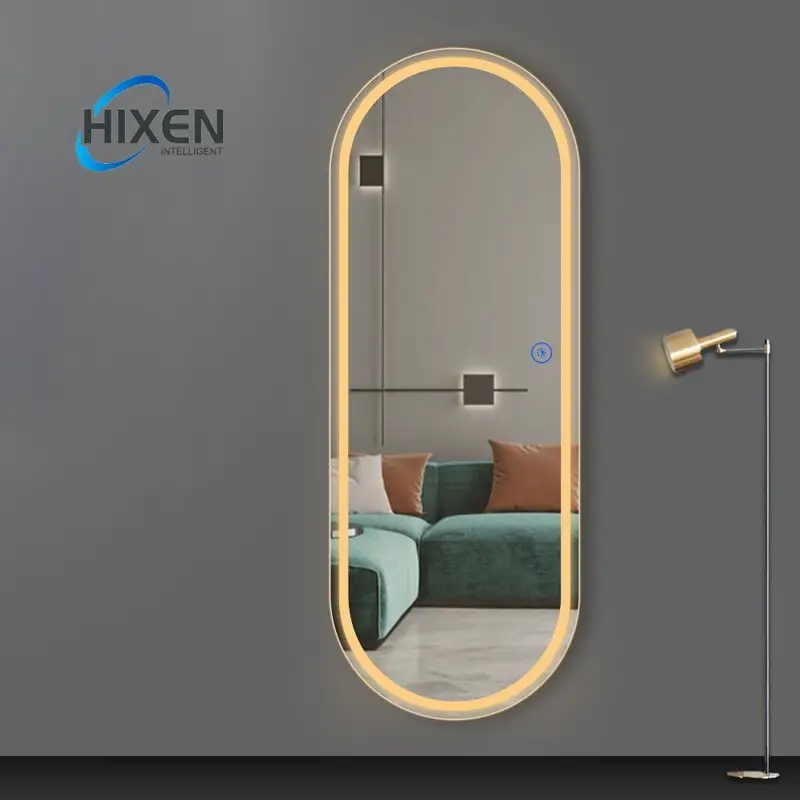
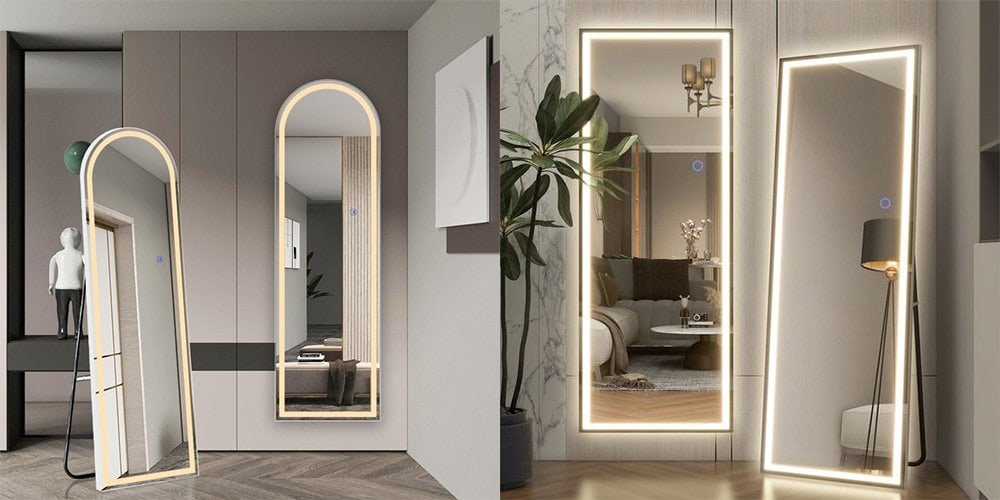
Créer un miroir pleine longueur DIY avec des lumières présente des défis uniques en raison de sa taille et de ses exigences d'installation.. Les miroirs sur toute la longueur nécessitent une attention particulière pour le montage et la distribution de l'éclairage.
Pour un miroir LED pleine longueur, fixer un panneau de support solide au mur, fixez le miroir, installer des bandes LED autour du périmètre ou derrière le miroir, et assurent une répartition uniforme du poids pour un montage sûr. Pensez à ajouter un cadre pour dissimuler les bords et la quincaillerie.
Une mise en œuvre réussie nécessite une planification et une construction minutieuses.
- D'abord, Sélectionnez un miroir au moins 48 pouces de hauteur positionné 12 pouces du sol pour une visualisation optimale de tout le corps.
- Deuxième, créez un système de montage stable : pensez aux taquets français pour répartir le poids uniformément sur le mur.
- Troisième, pour le rétroéclairage, installez des bandes LED selon un motif en grille plutôt que simplement sur le périmètre pour garantir un éclairage uniforme sur la grande surface.
- Quatrième, incorporez des canaux en aluminium avec des diffuseurs pour éliminer les points LED visibles et créer une distribution de lumière d'aspect professionnel.
- Cinquième, pour les miroirs dépassant 60 pouces de hauteur, installez des points d'injection de puissance en haut et en bas pour maintenir une luminosité constante partout.
Enfin, pensez à ajouter un capteur de mouvement pour un fonctionnement mains libres, particulièrement utile pour un miroir lumineux dans une chambre lorsque vous vous habillez. Lorsqu'il est correctement exécuté, un miroir LED pleine longueur DIY transforme votre chambre ou votre dressing avec à la fois un éclairage fonctionnel et une ambiance sophistiquée à une fraction du prix de détail.
Comment construire un miroir intelligent LED pleine longueur DIY?
La création d'une version intelligente de votre miroir LED pleine longueur intègre une technologie pour une fonctionnalité améliorée. Les fonctionnalités intelligentes élèvent un miroir de base à un accessoire interactif pour la maison.
Pour construire un miroir intelligent LED pleine longueur DIY, commencez avec un miroir sans tain ou appliquez un film réfléchissant sur le verre, construire un cadre abritant des bandes LED et un moniteur d'affichage, ajoutez un microcontrôleur comme Framboise Pi, et programmez les fonctionnalités intelligentes souhaitées, notamment l'affichage de la météo ou l'intégration du calendrier..
La mise en œuvre de fonctionnalités intelligentes nécessite l’intégration transparente de plusieurs technologies. Commencez par sélectionner le matériau de miroir approprié : achetez un miroir sans tain ou appliquez un film réfléchissant sur le verre avec 70-80% transparence. Montez un écran mince derrière le miroir, en s'assurant qu'il s'aligne parfaitement avec la zone de visualisation.
Installez un système de micro-ordinateur tel que Raspberry Pi avec le logiciel approprié (MagicMirror² est populaire pour cette application). Programmez les fonctionnalités souhaitées telles que les mises à jour météo, événements du calendrier, gros titres de l'actualité, ou des mesures de condition physique via les modules disponibles. Intégrez des capteurs de mouvement pour activer l'écran uniquement lorsque quelqu'un se tient devant le miroir, économiser l'énergie.
Pour des fonctionnalités avancées, intégrer la commande vocale à l'aide de systèmes tels que Google Assistant ou Amazon Alexa via du matériel supplémentaire. Assurez-vous que tous les appareils électroniques restent correctement ventilés pour éviter la surchauffe, éventuellement ajouter de petits ventilateurs de refroidissement si nécessaire. Créer des panneaux d'accès pour la maintenance et les mises à jour. Avec une bonne mise en œuvre, votre miroir intelligent DIY combinera la fonctionnalité d'un miroir mural de courtoisie éclairé avec la technologie interactive, créer un ajout vraiment unique à votre maison.
Pouvez-vous ajouter des LED à un miroir existant?
L'ajout d'un éclairage LED à un miroir existant est tout à fait réalisable et souvent plus économique que l'achat d'un nouveau miroir LED.. Cette approche vous permet de mettre à niveau les miroirs que vous possédez et aimez déjà.
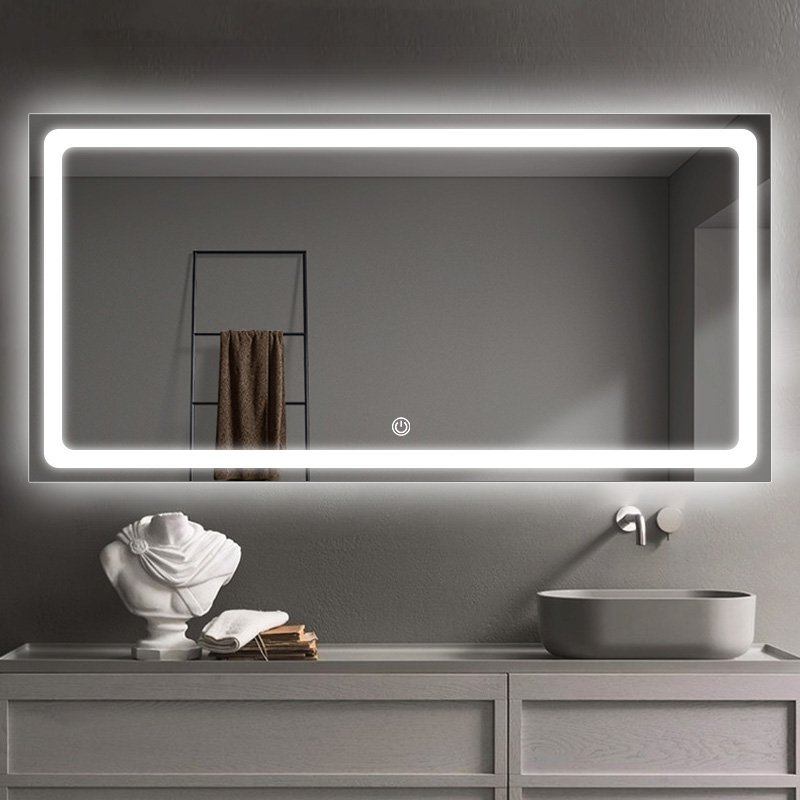
Oui, les miroirs existants peuvent être améliorés avec un éclairage LED en installant des bandes LED autour du périmètre, derrière le miroir pour le rétroéclairage, ou en créant un nouveau cadre avec éclairage intégré. L’approche dépend du système de fixation du miroir et de vos préférences esthétiques.
La modernisation des miroirs existants nécessite des approches adaptables en fonction du type de miroir. Pour miroirs muraux sans cadre, l'installation d'un périmètre de bandes LED directement sur la surface du miroir crée un éclairage efficace pour l'application du maquillage. Appliquer des bandes environ 1-2 pouces du bord en utilisant un adhésif transparent pour une visibilité minimale.
Pour les miroirs encadrés, installez des bandes LED sur le bord intérieur du cadre tourné vers l'intérieur vers le miroir, dissimuler le matériel tout en fournissant un éclairage. Pour créer un rétroéclairage pour les miroirs muraux existants, retirer temporairement le miroir, installez des bandes LED sur le mur selon un motif de grille ou de périmètre, puis remontez le miroir à l'aide d'entretoises pour créer un espace entre le mur et la surface du miroir..
Pour les installations de salle de bains, assurez-vous que tous les composants ajoutés sont conçus pour les environnements humides. Lors de la mise à niveau de miroirs anciens ou décoratifs, faites particulièrement attention aux adhésifs pour éviter d'endommager les surfaces ou les cadres vintage. Avec une installation soignée, vous pouvez transformer n'importe quel miroir existant en un miroir lumineux à LED d'aspect professionnel sans acheter un tout nouveau luminaire.
Pouvez-vous fabriquer un miroir DIY à partir de zéro?
Créer un miroir à partir de composants de base est un projet avancé mais enrichissant pour les bricoleurs dévoués. Construire à partir de zéro offre un potentiel de personnalisation ultime pour la conception de votre miroir.
Oui, vous pouvez créer un miroir à partir de zéro en achetant du verre miroir ou en appliquant un film réfléchissant sur du verre ordinaire, créer un cadre personnalisé, installer des systèmes d'éclairage LED, et l'ajout de fonctionnalités souhaitées telles que des désembueurs ou des panneaux de grossissement pour des fonctionnalités spécialisées.
Créer un miroir à partir de composants fondamentaux nécessite des techniques spécifiques pour des résultats professionnels. Commencez par sélectionner le verre approprié : le verre de sécurité trempé est recommandé pour les installations de salle de bain afin d'éviter les blessures en cas de bris.. Appliquez un revêtement réfléchissant soit en achetant du verre miroir pré-argenté, soit en utilisant un film miroir spécialisé appliqué sur du verre ordinaire. (bien que l'argenture professionnelle donne des résultats supérieurs).
Pour les installations de salle de bains, appliquer un revêtement antibuée pour éviter la condensation pendant les douches. Construire une charpente en utilisant des matériaux résistants à l'eau comme le bois traité, PVC, ou aluminium, canaux intégrant des boîtiers pour bandes LED. Installez un éclairage LED avec des diffuseurs appropriés : les canaux en aluminium avec des couvercles dépolis créent des résultats d'aspect professionnel sans points LED individuels visibles..
Pour un miroir de courtoisie éclairé DIY, inclure des connexions électriques appropriées avec un boîtier étanche pour les interrupteurs et les gradateurs dans les salles de bains. Lors de la construction de miroirs pleine longueur, assurer un support structurel adéquat pour le poids du verre (environ 3.27 livres par pied carré pour un verre de ¼ de pouce). Créer à partir de zéro permet d'implémenter des fonctionnalités avancées telles que des commutateurs tactiles, LED changeant de couleur, ou panneaux grossissants intégrés positionnés de manière optimale pour l'application du maquillage.

Quels sont les problèmes courants et les solutions dans les projets de miroirs LED DIY?
Comprendre les défis potentiels aide à prévenir la frustration et garantit une projet de miroir LED réussi. La conscience des problèmes courants permet une résolution préventive des problèmes.
Les problèmes fréquents incluent un éclairage inégal, points LED visibles, dégâts d'humidité dans les salles de bains, luminosité insuffisante, et problèmes d'alimentation électrique. Les solutions impliquent l'utilisation de diffuseurs, composants résistants aux intempéries, calculer la densité de LED appropriée, et dimensionner correctement les alimentations.
Relever des défis techniques spécifiques garantit des résultats de qualité professionnelle. Pour un éclairage inégal (en particulier dans les idées d'éclairage de miroir DIY), installez des canaux en aluminium avec des diffuseurs et maintenez un espacement constant entre les bandes LED – généralement pas plus de 4 pouces de distance pour un éclairage uniforme.
Pour éviter les dommages causés par l’humidité, appliquez du mastic silicone autour de toutes les connexions et utilisez des bandes LED étanches avec un indice IP65+ pour les installations de salle de bain. Pour les lumières vacillantes, garantir que la capacité d'alimentation électrique dépasse les exigences des LED en 20% et vérifiez les connexions desserrées. Pour éliminer les taches brunes dans les coins, utilisez des connecteurs d'angle flexibles plutôt que de plier les bandes LED à des angles vifs, ce qui pourrait endommager les circuits internes.
Pour les miroirs avec une luminosité insuffisante, calculer les lumens requis en fonction de l'usage prévu : l'application du maquillage nécessite environ 900-1200 lumens totaux, tandis que l'éclairage ambiant n'a besoin que 300-600 lumens. Pour éviter la surchauffe, installez des bandes LED sur des canaux en aluminium qui agissent comme des dissipateurs de chaleur plutôt que directement sur les surfaces des miroirs ou des cadres.
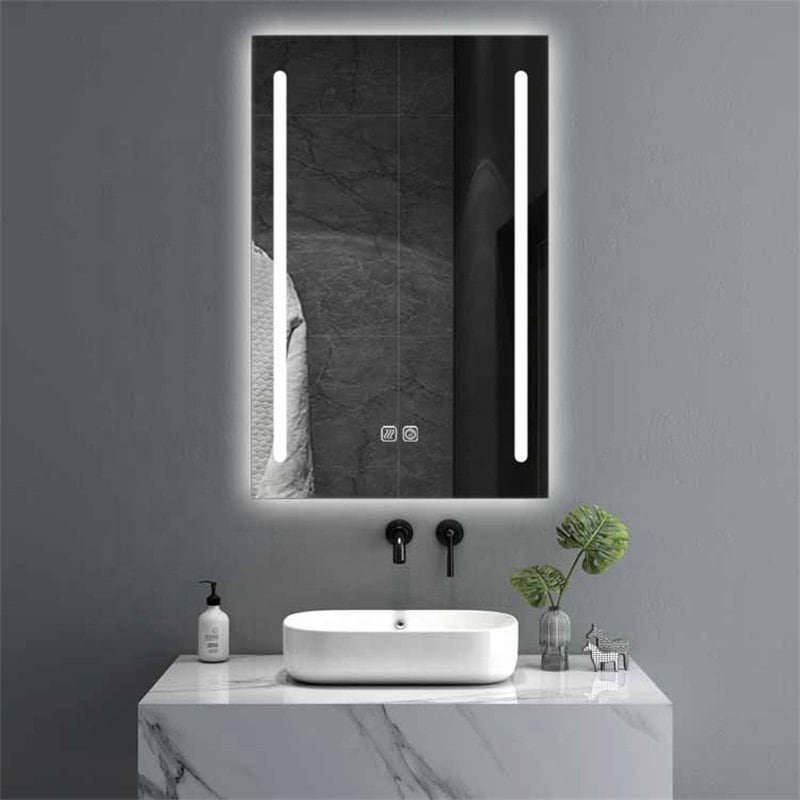
Pour les projets de miroir de courtoisie DIY avec lumières LED, installez des LED à peu près au niveau des yeux des deux côtés pour un éclairage du visage sans ombre. Résoudre ces problèmes courants de manière proactive garantit que votre projet de bricolage obtiendra des résultats de qualité professionnelle sans révisions coûteuses..
Conclusion
Créer votre propre miroir LED combine des solutions d'éclairage pratiques avec une expression personnelle. Avec du matériel approprié, planification, et techniques, vous pouvez créer un miroir personnalisé qui améliore votre routine quotidienne et rehausse le design de votre espace.
- Pour apprendre à choisir le bon miroir de salle de bain, cliquez ici.
- Pour apprendre à installer un miroir, choisissez ici.
- Pour apprendre à choisir le miroir de bonne taille, cliquez ici.
- Pour apprendre comment les miroirs sont fabriqués ici.
- Cliquez ici et vous apprendrez pourquoi nous avons l'air mieux dans les miroirs.
- Cliquez ici, vous découvrirez le haut 10 fabricants de miroir LED pour 2024.
- Cliquez ici pour découvrir pourquoi ma lumière miroir de vanité ne s'allume pas?
- Découvrez quelle est la taille du miroir de salle de bain?Cliquez ici
- Cliquez ici si vous ne savez pas comment nettoyer votre miroir
- Pour savoir comment réparer le miroir du capteur tactile ne fonctionne pas, cliquez ici