|
Conseguir tu Trinidad Audio jugador listo...
|
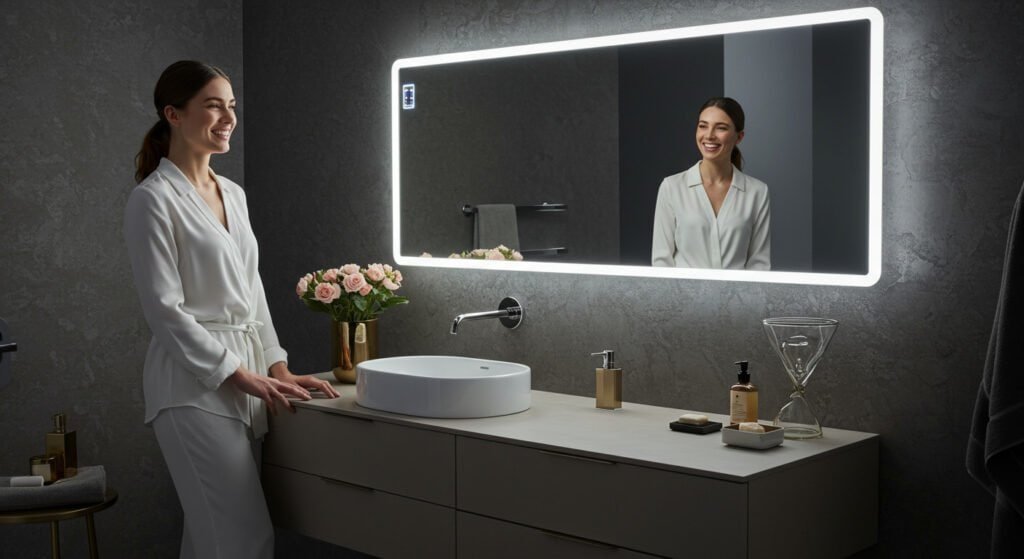
The modern bathroom has evolved beyond basic functionality, with LED mirrors becoming an essential element of contemporary design. Yet, many property owners and contractors encounter significant challenges when installing LED mirror. You might find yourself wondering about electrical connections, proper mounting techniques, or whether professional installation is necessary.
This comprehensive guide will walk you through every aspect of the installation process, ensuring you can make informed decisions whether you’re a professional contractor or a property owner planning a bathroom renovation.
Essential Preparation Before LED Mirror Installation
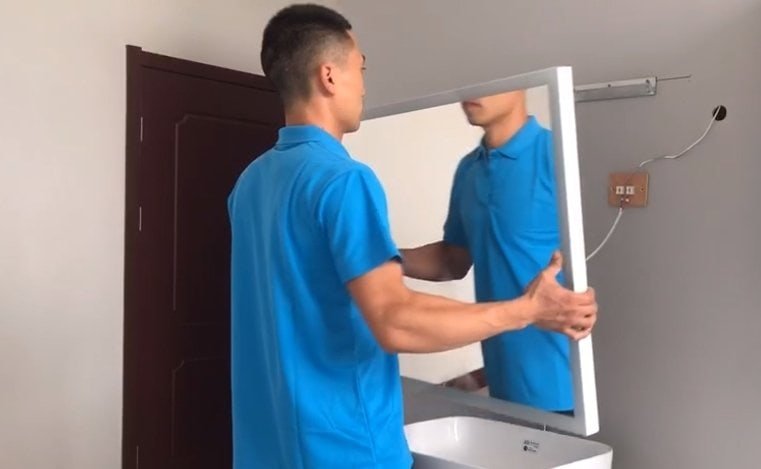
Success in LED mirror installation begins with thorough preparation. Creating the perfect environment for your bathroom LED mirror installation requires careful consideration of several crucial factors.
First we need to make sure that the wall must be able to support the weight of the mirror, and the electrical considerations need to comply with our local building codes and safety standards.
Until you have it installed correctly, gather the following basic tools: an electric drill with various bit sizes, a reliable level (preferably 24 inches or longer), cinta métrica, juego de destornillador, wire strippers, probador de voltaje, and appropriate mounting hardware. Safety equipment is equally important – always use safety glasses, guantes de trabajo, and a non-conductive ladder when working with electrical components.
The mirror should be placed at a height that is comfortable for your family members while ensuring proper lighting for daily grooming tasks. The standard mounting height is usually 72 inches from the floor to the center of the mirror, but this can be adjusted to suit your specific needs and the height of your family members.

How to install lighted mirror?
1. Prepare Your Space
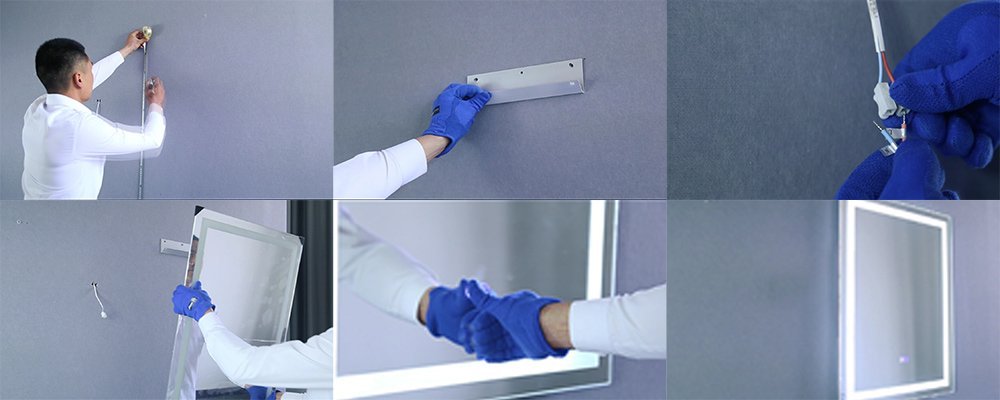
Begin by turning off power at the circuit breaker – never rely solely on wall switches when working with electrical components. Use your voltage tester to verify power is completely off before proceeding with any electrical work.
- Turn Off Power: Switch off the circuit breaker to ensure safety. Avoid relying solely on wall switches.
- Check Power: Use a voltage tester to confirm no electricity is running to the wires.
2. Mark the Installation Spot
For drywall installations, locate and mark wall studs – these provide the most secure mounting points. If studs aren’t available in ideal locations, use heavy-duty wall anchors rated for at least 1.5 veces el peso del espejo.
- Use a measuring tape and level to determine the ideal position.
- Locate wall studs for secure mounting. If unavailable, use heavy-duty wall anchors rated for at least 1.5x the mirror’s weight.
3. Install the Mounting Bracket
- Align the bracket using a level, and mark the mounting points.。
- Pre-drill holes to avoid wall damage and secure the bracket with screws or anchors, depending on your wall type.
4. Conecte el cableado
The electrical connection phase requires particular attention to safety and local building codes. The wiring sequence matters: connect the ground wire first (typically green), followed by neutral (blanco), and finally the hot wire (black).Please note that the mirror voltage should match your local voltage.
- Do LED Mirrors Have to Be Wired In?CONDUJO
- Sí, most LED mirrors require wiring. Plug-in models are available but less common.
- How Do You Get Power to an LED Mirror?
- Connect the wires in the following sequence:
- Ground wire (green).
- Neutral wire (blanco).
- Hot wire (black).
- Ensure the mirror’s voltage matches your local power supply.
- Connect the wires in the following sequence:
5. Secure the Mirror
Position the bracket precisely using your level, and mark mounting points carefully. Pre-drill holes to prevent wall damage and use appropriate anchors based on your wall type. Double-check the bracket’s level and security before proceeding – any misalignment here will be visible in the final installation.
- Carefully mount the mirror onto the bracket. Double-check alignment and stability.
6. Prueba el espejo
After the installation is complete, please test the mirror to see if it can be turned on.
- Restore power at the circuit breaker and test all features, including lighting, defogador, y conectividad Bluetooth.
También, where you are installing custom-sized LED mirrors, such as larger mirrors, additional support points will be required and reinforced wall construction may be necessary. Please calculate your weight distribution carefully and consider using additional mounting brackets for mirrors that are larger than standard sizes. Custom installations often benefit from a professional assessment to ensure proper support and safety.
Smart-enabled LED mirrors require careful attention to wireless connectivity during installation. Position these mirrors within reliable WiFi coverage areas and consider potential interference from metal studs or electrical wiring. Test connectivity thoroughly before completing installation, as post-installation adjustments might prove difficult or impossible.
Do You Need an Electrician to Install an LED Mirror?
Whether or not you are looking for an electrical worker depends on whether or not you know anything about electricity. The simplest example is ground (usually green), then neutral (blanco) and finally hot (black) wire. If you’re unfamiliar with electrical work or your mirror includes complex features, hiring an electrician ensures safety and compliance with local building codes.
How much does it cost to install LED mirrors?
Professional installation typically ranges from $100-300, not including the mirror cost. This investment provides peace of mind through proper permits, code compliance, and warranty protection. Professional installers bring expertise in handling complex electrical systems and unusual wall configurations.
DIY installation can save money, with material costs typically between $5-50. Sin embargo, this approach requires significant technical knowledge and time investment. You’ll need to understand local electrical codes, proper mounting techniques, and safety requirements.
How do you get power to a LED mirror?
Understanding power requirements represents a crucial aspect of LED mirror installation. While most units operate on standard household voltage, proper connection methods vary based on local codes and mirror specifications. Hardwired installations provide a clean, permanent solution but require more extensive electrical work. Plug-in installations offer simplicity but may limit placement options and might not meet all local codes.
Electrical specifications for bathroom LED mirror installation you need to pay careful attention to. Most mirrors require dedicated circuits protected by GFCI devices. Power consumption varies based on features – basic LED illumination might draw as little as 20 vatios, while mirrors with additional features like defogging or Bluetooth speakers might require up to 100 watts or more.
Proper grounding and moisture protection are essential considerations in bathroom installations. Ensure all electrical connections meet IPX4 rating requirements at minimum. Using approved junction boxes and water-resistant connections helps prevent moisture-related problems and ensures long-term safety.

Do You Need Special Fittings for LED Lights?
No!Most LED mirrors are compatible with standard electrical fittings. We buy led mirrors with all the fittings installed, you just need to insert the plug into the socket. Unless you need something else, you can explain your claim with the merchant at the time of purchase.
Are LED mirrors expensive to run?
LED mirror operating costs remain remarkably economical despite their advanced features. Annual electricity consumption typically results in minimal cost impact, que se extiende desde $5-15 depending on usage patterns and local utility rates. The energy efficiency of LED technology contributes significantly to these low operating costs, with most mirrors consuming less power than traditional bathroom lighting solutions.
Installation costs vary significantly based on complexity and location. Basic installation materials might cost under $100, while professional installation services typically range from $200-500. Consider these costs alongside potential long-term benefits such as improved lighting quality, reduced energy consumption, and enhanced bathroom functionality.
Troubleshooting and Maintenance of LED Mirrors
Proper troubleshooting and maintenance procedures ensure optimal performance and longevity of your LED mirror installation. Understanding common issues and their solutions helps maintain functionality while preventing costly repairs.
Electrical problems usually manifest themselves as irregular lighting behavior. If your lighted mirrors show flickering lights, that usually indicates a loose connection or dimmer incompatibility. You can fix these problems by checking all the wire connections in the junction box and making sure the wire gauge is properly selected. Something like some of the LED sections remaining dark may indicate a damaged LED strip or a connection issue at a specific point.
Installation security needs to be verified by you on a regular basis, especially in wet bathroom environments. The stability of wall anchors can degrade over time, especially if it can occur if you have improperly installed them initially.
Signs of installation problems include uneven hanging, gaps between the mirror and the wall, or unusual sounds during normal use. You can resolve these issues in time by reinforcing the mounting points and making sure you distribute the weight properly on all support brackets.
The maintenance requirements for bathroom mirrors with lights behind them remain relatively straightforward but require consistency. Develop a regular maintenance schedule incorporating monthly surface cleaning, quarterly electrical inspections, and semi-annual mounting security checks. This proactive approach helps identify potential issues before they become significant problems.

Conclusión
Successful LED mirror installation combines technical expertise, careful planning, y atención al detalle. The process requires understanding electrical requirements, proper mounting techniques, and safety considerations. Whether choosing professional installation or DIY approaches, maintaining focus on quality and safety ensures optimal results.
The decision between professional and DIY installation should reflect your technical capabilities, time availability, and comfort with electrical work. Consider local building codes, warranty requirements, and long-term maintenance needs when making this choice. Professional installation often provides peace of mind through expertise and warranty protection.
To learn more about LED mirror options and installation requirements, contact our technical support team for detailed specifications and customized recommendations for your specific application. Our experienced professionals can guide you through product selection, installation planning, and long-term maintenance considerations.
- ¿Cuáles son los beneficios del espejo LED??
- ¿Cuál es la mejor luz para el espejo de vanidad??
- Para aprender a elegir el espejo de baño derecho, haga clic aquí.
- Para aprender a instalar un espejo elija aquí.
- Para aprender a elegir el espejo de tamaño correcto, haga clic aquí.
- Haga clic aquí y aprenderá por qué nos vemos mejor en los espejos.
- Haga clic aquí, aprenderá sobre la parte superior 10 Fabricantes de espejo LED para 2024.


